Those of you who have not gotten a silk or satin scarf for sleeping, do so now! Ever since i started wrapping my hair in a silk scarf before I sleep, I have woken up every morning to smooth, beautiful hair. Before, my hair was tangled and frizzy each morning, requiring careful and time-consuming brushing. Now, I just have to run my fingers once through to check for tangles, and there are hardly any!
Silk scarves don't have to be expensive. I got mine from Dharma trading and they are very affordable, even for international purchases. I bought 2 44" x 44" silk scarves, one Habotai and one Silk Satin. The Habotai one was cheaper, but the Silk Satin one was way smoother and silkier. That is not to say the Habotai one wasn't silky, but it had more of a texture than the Satin one.
I tie the Silk Satin scarf around my pillow, and the Habotai one I wrap around my head and hair after loosely bunning hair into a low bun at the nape of my neck. This is simply because the Habotai one is slightly lighter and thinner, and thus I feel it allows my head to "breathe" more easily. You could probably make do with smaller sized scarves if you are just going to tie them around your head,but I got the biggest size they had as I wanted to use it for my pillow as well. On that note, they do carry silk pillowcases as well, but I thought that a scarf would fit more easily around pillows of different sizes.
Friday, December 11, 2009
Labels: Prevent tangles, Protect hair when sleeping, Silk pillowcase, Silk scarf0 comments
There has been alot of controversy revolving around the use of silicone in hair products. It is said to mask damage and split ends, such that when one stops the use of silicone, all the accumulated damage shows through at once. While this may be true, some people have found that their hair cannot live without silicone! In the past, my hair was very happy with silicone serums, and was shiny and smooth from the use of them. However, it has become very finicky of late,and ends up crunchy if I use a leave-in that contains silicone. Thus, I decided to do a little experimenting to see decide if I should stick with silicone or not.
First thing I did was to abandon my silicone serum in favour of my trusty coconut oil. I shampooed my entire length to get rid of the silicone serum in my hair, and then applied coconut oil when damp. Lo and behold, my hair was much softer and happier with the use of coconut oil. To ensure this was really the result of switching to oil, I tried this for a few more washes, achieving the same result. My silicone serum is happily collecting dust on my shelf now, at least until my hair decides it needs a change again.
Next, I thought that maybe I should try a silicone-free wash-off conditioner too. So I went out and got one, using it for my next wash. This one was a no-go. My hair was tangly and unmanageable, oiling it did not help either. So...I went back to my silicone-loaded conditioner.
Funny isn't it, that my hair loves a silicone wash-off but hates a silicone leave-in? For those having hair problems, it's best to do some experimenting of your own, but be sure to only change one element at a time, so you know exactly what you changed that made a difference. For example, try a different serum while keeping all other parts of your routine the same. Don't change your leave-in and wash-off and the same time! Also remember that hair, like your skin, is always changing. Products you have been happy with for a long time may suddenly stop working!
Friday, December 4, 2009
Labels: Leave-in conditioner, Prevent tangles, Silicone products, Split ends0 comments
Recently, I have been trying out a few different methods of washing my hair, namely water-only(WO), conditioner-water-conditoner(CWC), conditoner-only washing(CO-ing) and finally oil-water-conditoner(OWC). Here's my take on each of the above mentioned methods:
WO didn't work for me at all. My hair was a tangled mess after washing with water, and i couldn't run my fingers through it while it was still wet. So, I toweled dry and waited for it to become damp before trying to detangle again. However, even after applying leave-in conditioner and oil, there were still masses of tangles that took me very long to carefully pick out. This is definitely something I will not try again.
CWC was much better compared to WO. In fact, it is one of my favourite methods, other than OWC, but more on that later. I used a rather cheap conditoner for the first C, coating my hair from ear down and massaging in to loosen dirt and buildup. Then I shampooed my scalp and washed both shampoo and conditioner away at the same time. For the next C, I used my usual conditioner, once again coating from ear down, and rubbing the leftovers lightly over the scalp area. This method keeps my hair tangle-free and much less dry than a normal shampoo + conditioner wash would do.
Following my success with CWC, I decided to try out CO-ing, where only conditioner and no shampoo is used. This did not work for me as I have a oily scalp and the conditioner could not clean it properly, thus leading to and itchy scalp. Also, the conditioner built up on my hair very quickly, leaving me with white flakes whenever I brush.
Lastly, i tried a modified version of CWC, the OWC. I applied coconut oil liberally to my hair from ear down, and left it in for at least an hour before proceeding to wash. During the wash, I shampooed my scalp and let the suds flow down to the rest of the hair when I rinsed. After that I followed with conditioner as per the method in CWC.
Both CWC and OWC left the best results, but I think I would probably use OWC more often, as I like to use coconut oil in my hair as a deep treatment.
Saturday, November 28, 2009
Labels: Coconut oil, Conditioner-only, Conditioner-water-conditioner, Dry hair, Oil-water-conditoner, Oily scalp, Prevent tangles, Wash methods, Water-only1 comments
Washing your long hair daily may result in unnecessary damage and dryness, and yet some of us(especially those with an oily scalp) must wash daily or risk having greasy, limp hair and even scalp pimples.
Thus, it is beneficial to be able to wash one's scalp without washing the rest of the length, but how does one go about doing this?
There are many different methods of scalp washing, one of which is to wrap the length in a plastic bag or shower cap before proceeding to wash the scalp. However, I find that water always somehow seeps into the plastic bag, and I end up with a tangled mess. Therefore, I will be introducing a different method which I personally use, and find more effective, albeit a little more complicated.
Details of the full scalp wash method can be found here, where a highly useful article complete with pictures guides you through the steps required. However, I did make some minor modifications to the routine in order to make it more convenient for myself.
Firstly, I find it impossible to handle a shampoo bottle with only one hand (the other being busy holding the braid up), so i pour some shampoo into an old drink bottle beforehand, fill that up with water, and shake vigorously to get a sort of shampoo-mix. This is also useful for those who prefer to use their shampoo diluted.
Secondly, I prefer to use a squeeze bottle with a nozzle to wet my hair. I find that I can get my scalp thoroughly wet quicker and with less manipulation this way, as I can position the nozzle on my scalp and squirt to wet the inner layers first before moving outwards.
Lastly, I do a scalp wash daily (when not doing a full wash including length), but only use shampoo on alternate days. On other days, I do a water-only wash using the same method, except that I skip the shampoo and simply massage the scalp after wetting it down.
Do try out and perhaps even create your own method of doing a scalp wash, one that works for you. Feel free to post your method under comments!
 I will be reviewing Phyto's Phytolactum+ Intelligent Shampoo, which is a great shampoo for my sensitive scalp! But first, some details on the product:
Product Description
What it is:
A gentle, daily shampoo for medium to fine hair that helps maintain hydration as it soothes and calms the scalp.
What it is formulated to do: Phytolactum+ effectively treats the scalp's ecosystem by preserving its natural protective shield. It is formulated with a natural, clarifying base, which gently cleanses irritated and sensitive scalps providing fast relief. Hair and scalp are protected with each shampoo, leading the way to healthy, beautiful hair.
Ingredients
Prunus Amygdalus Dulcis (Sweet Almond) Fruit Extract, Water, Sodium Laureth Sulfate, Sodium Laureth-8 Sulfate (Derived From Coconut Oil), Decyl Glucoside, Disodium Cocoamphodiacetate, Sodium Laureth-11 Carboxylate, Magnesium Laureth Sulfate, Magnesium Laureth-8 Sulfate, Sodium Oleth Sulfate, Magnesium Oleth Sulfate (Derived From Coconut Oil), Xylitol, Zanthoxylum Alatum Extract, Lacitol, PEG-15 Cocopolyamine, Isostearamide Mipa, PEG-150 Distearate, Hydroxypropyl Guar Hydroxypropyltrimonium Chloride Glycerin, Lauryl Pyrrolidone, Xanthan Gum, Styrene/Acrylates Copolymer, Fragrance, Tetrasodium EDTA, Sodium Chloride, Phenoxyethanol, Methylchloroisothiazolinone, Methylisothiazolinone, Citric Acid.
My Review
As per the product description, this shampoo soothed my sensitive scalp, leaving it feeling clean and comfortable, with none of the itchiness! I also find that my scalp gets oily less quickly, meaning the shampoo is probably doing a good job balancing the ecosystem of my scalp.
However, I find that hair gets too squeaky clean when using Phytolactum+. After shampooing, I am unable to run my fingers through my hair at all, at least not until I apply conditioner. That said, it works very well as a clarifying shampoo to get rid of product residue on my strands.
I think the best way to use Phytolactum+ would be to alternate it with another more hydrating shampoo, and use this mainly for scalp washes or to clarify every once in a while.
Saturday, October 24, 2009
Labels: Clarifying wash, Phyto, Product review, Sensitive scalp0 comments
You're tired of your current hair parting, and decide to change it, for example from a center part to a side part. So, you grab your comb and comb out a nice side part, holding the parted hair down. Satisfied with your new part, you release your hand, and to your horror, the hair poofs up and flops back to its original position.
At one point or another, you may experience the scenario above. Having kept your hair parted in a certain way for years, you feel that its time for a fresh look, but how do you go about changing a stubborn part? Here are some tips to aid you in your quest for a new hair part:
1. It is easier to restyle your hair when it is wet. Thus, after washing hair, carefully comb out the new part and blow dry your new style. Do this for 1-2 washings and your hair should naturally fall into its new part thereafter. More stubborn parts may need to repeat a few more times.
2. For those who do not like to blow dry their hair, pin hair down after combing into the new part, and leave to air-dry. As with the blow-drying method, you may have to repeat a few times for the part to stay.
3. To change part without having to wash hair, comb into new part, dampen hair with some water, and pin into place. Alternatively, use a leave-in conditioner instead of water. However, this method may take longer for your hair to recognise its new part.
Note that those with thinner hair are likely to be able to change their part more easily, and those with thicker hair may face more difficulties. This is because thicker hair means there is more hair to "flip over". Also, drastic changes to your hair part, for example, from a center part to a deep side part, may require more patience.
Many people either leave their hair to air-dry or use a blow-dryer directly after washing their hair. Leaving it to air-dry without detangling first may lead to hair being frizzy when dry, and blow-drying without heat protection is very damaging to your hair. Here are some steps you can take to ensure healthy and beautiful hair after washing:
1. Use an absorbent towel to soak up excess water from your hair immediately after washing it. Do not rub your hair with the towel! Use dabbing motions or simply wrap your hair in the towel for a few minutes.
2. On damp hair, apply a leave-in conditioner to nourish and moisturise hair, and follow up with a light layer of oil to seal in that moisture. You may choose to use either one of leave-in conditioner or oil according to your preference, but if your hair is normally very tangled after washing, it is best to choose one which provides some slip for easy detangling.
3. Proceed to detangle hair using a wide tooth comb. Always start from the bottom, and slowly move upwards towards the scalp when your comb can easily slide through that portion of hair. Never ever start from the scalp as you will cause all knots and tangles to accumulated downwards, causing an even bigger knot which may be very difficult to remove.
4. If you are planning to blow-dry your hair, make sure that your leave-in conditioner has heat protection properties. If not, leave hair to air-dry. One thing to note when blow-drying; try to blow your hair until it's about 95% dry, then leave the other 5% to air dry naturally. This reduces the chance of you over-drying your hair.
5. Lastly, do note that wet hair is very fragile! Always handle it with extra care.
I generally do not recommend those with long hair to apply too much heat to their hair, as you risk frying it, especially if you do not take proper precautions to protect your hair from the heat. However, those who do not have straight hair, or have to style it for various occasions, here's an article that may be of use to you.
Proper Way to Use a Flat Iron
By Naomi WestWomen in all walks of lifes and in every country battle with one of the same things certain mornings of their lives. What could that possibly be you ask? The bad hair day! This day wreaks fear in the heart of most women. We are here to offer a solution for some of you in order to help you through this traumatic time.
Not everyone has the same type of hair and almost all of us wishes we had someone else's. One of the hardest hair types to have is the thick hair that doesn't learn to lie flat on its own. For some people using many conditioners and serums doesn't cut it. The minute you blow dry the hair it sticks out in every direction. The best way to fix this problem is to purchase a flat iron.A flat iron is similar to a curling iron in the fact that it uses heat to help tame the hair and let it flow in the direction that you are going in. They are affordable for anyone and can range in different sizes depending on how long your hair is and how often you will be using it.
Because you use heat to straighten your hair with a flat iron you need to make sure that your hair is thoroughly dried before you begin. Also keep in mind that the heat can damage the hair (much like a blow dryer can) so you may not want to use a high heat every time. The best type of flat iron to purchase are ceramic ones because they diffuse the heat and can cause less damage.There are a few steps you need to take to help make the straightening process faster and much easier on you. The first thing you will want to do is to place styling cream in your hair while it is still damp. Those of you with coarse, curly hair should consider using a straightening balm. You will also need to use a heat protective spray before you blow dry. Part your hair into four sections and blow dry each of those sections.
After the hair is dry separate the hair into sections again. To straighten take two inches of your hair and squeeze the flat iron over it and as close to the scalp as you can. Pull down the iron slowly over the full length of hair.When you have finished straightening all of your hair apply a serum gloss (not too much) to your hair. This will help to calm any stray frizzies and to give your hair extra shine. A flat iron is one of the best hair salon equipment that we can keep in our home.
Having the best straightening iron and other Salon Equipment is just one step when starting your own salon. You also need to find Used Salon Furniture and more Hairdressing Equipment to complete the ensemble.Article Source: http://EzineArticles.com/?expert=Naomi_West
http://EzineArticles.com/?Proper-Way-to-Use-a-Flat-Iron&id=1744387
The Fundamentals of Good Hair Care
By May Harrow
Regular exercise, good nutrition and sleep habits make you healthy in body, mind and soul. Stress and undernourished diet leads to ill health and affects the hair and scalp too. Hair care tips given below are some of the guidelines people may follow, to maintain healthy, lustrous hair.
Certain hair care products can be very damaging to the hair. Using a blow dryer is one big mistake and most of us use it because we don't have the time to dry our hair naturally. We are always racing against time in this corporate world. It is preferable to use the cool mode when using the dryer as hot air is damaging to the scalp. It is always good to pat dry the hair with a towel and let the rest of the moisture dry up.
Another good hair care tip to observe is to put your cap on before swimming and always wet the hair before getting into the pool. This way chlorinated water does not enter much of the hair as the water is already soaked up in the hair.
Try and avoid combing the hair when it is wet as it breaks easily. Combs should always have teeth that are spaced widely and should be kept clean always.
Using hot water dries the hair and even scalds the scalp. It is always good to shower in cold water and this is an important hair care tip. If the water is too cold go in for lukewarm water.
Hair care products like shampoos and conditioner should be used carefully according to the hair type. Generally a trial and error basis is often the best way to find out what suits you best, but not at the cost of your hair. They can be substituted by organic products.
There are actually a lot of ways to manage your hair care routine. The most important thing is to make smart decisions when it comes to buying your hair care products.
Article Source: http://EzineArticles.com/?expert=May_Harrow
http://EzineArticles.com/?The-Fundamentals-of-Good-Hair-Care&id=3020335
Saturday, October 10, 2009
Labels: Blow drying, Chlorine protection, Detangling wet hair, General hair care0 comments
I've been using various leave-in conditioners for my hair throughout the years, but I recently discovered Phyto's line of leave-in conditioners, Phyto 7 for dry hair, and Phyto 9 for ultra dry hair. Before I move on to my review of these 2 leave-ins, here's some information on both products:
Phyto 7 Daily Hydrating Botanical Cream - Dry Hair

Product description
A genuine "day cream" for hair, PHYTO 7 is a unique plant-based formula consisting of seven plant extracts specially selected for their hydrating and regenerating properties (Calendula, Sage, Burdock, Willow, Soybean, Rosemary and Althea). Its creamy, non-greasy formula works to enhance the natural protection of dry hair by maintaining optimum moisture levels. Your hair regains shine, suppleness and body.
Ingredients
Althaea Officinalis Extract (Mucilage Vegetal), Arctium Majus Root Extract (Bardane), Rosmarinus Officinalis (Rosemary) Leaf Extract (Rosmarin), Salvia Officinalis (Sage) Leaf Extract (Sauge), Calendula Officinalis Flower Extract, Salix Alba (Willow) Leaf Extract (Saule), Lecithin (Soja), Sodium Dehydroacetate, Propylene Glycol, Phenoxyethanol, Parabens (Butyl, Ethyl).
Directions for Use
Apply after shampoo to towel-dried hair. Squeeze a pea size amount of Phyto 7 into the palm of your hair and distribute evenly throughout hair, concentrating on the ends. Do Not Rinse. Style as usual.
Phyto 9 Daily Ultra Nourishing Botanical Cream - Ultra Dry Hair
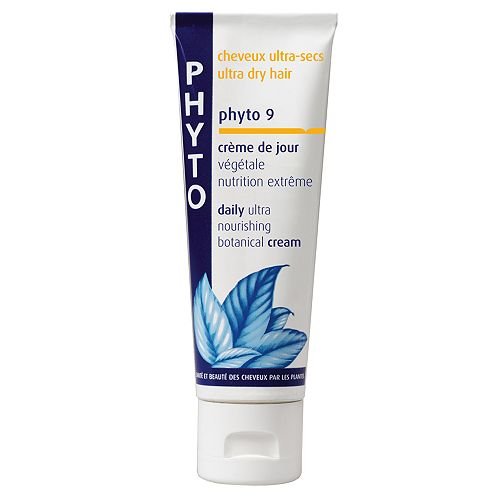
Product description
A genuine "day cream" for dehydrated hair, Phyto 9 is a combination of macadamia oil and plant extracts, all carefully selected for their hydrating and nourishing properties (St. John's wort, calendula, sage, burdock, willow, soybean, rosemary, althea).
Native to Hawaii and very rich in essential fatty acids, macadamia oil has the distinctive feature of resembling sebum and provides intense nourishment without leaving a greasy residue. Soybean, calendula, burdock and plant extracts penetrate the core of the hair fiber to help restore keratin moisture levels. Treated from within and protected on the outside, hair rapidly regains its original shine, suppleness and softness.
Ingredients
Althaea Officinalis Extract (Mucilage Vegetal), Macadamia Ternifolia Seed Oil, Arctium Majus Root Extract (Bardane), Rosmarinus Officinalis (Rosemary) Leaf Extract (Romarin), Salvia Officinalis (Sage) Leaf Extract (Sauge), Calendula Officinalis Flower Extract, Salix Alba (Willow) Leaf Extract (Saule), Hypericum Perforatum Extract (Millepertuis), Lecithin (Soja), Sodium Dehydroacetate, Propylene Glycol, Phenoxyethanol, Parabens (Butyl, Ethyl).
Directions for Use
Apply after shampoo to towel-dried hair. Squeeze a pea size amount of Phyto 9 into the palm of your hair and distribute evenly throughout hair, concentrating on the ends. Do Not Rinse. Style as usual.
My Review:
Having tried both leave-in conditioners, I have to conclude that I prefer Phyto 9 to Phyto 7. Phyto 7 has a slightly more watery texture while Phyto 9 is more creamy. On separate days, I tried Phyto 7 and Phyto 9 on my towel-dried hair. Phyto 7 did not have effect on my hair at all, applying it on towel-dried hair did not help untangle, and after air-drying my hair felt as dry and frizzy as ever. It probably wasn't rich enough for my hair. However, it was a total different story with Phyto 9.
After washing, my hair is normally rather tangled, and a good leave-in conditioner usually helps provide lubrication for ease of untangling. Phyto 9 is that leave-in conditioner. It smoothed down my hair and my fingers slid through tangles with little or no coaxing.
Air-dried hair was smooth, shiny and soft to the touch. My brush glided through my hair very easily. The best thing was, it did not weigh down my fine hair! Hair was full of bounce and looked extremely healthy, no lanky or dirty-looking effect like how some leave-ins give.
I did not have to used too much of the product, probably about a 1 cm squeeze into my palm for each half of the head. You do have to experiment to get the right amount that works for you as it depends on factors such as hair length, condition, and hair thickness.
I recommend that anyone with dry, frizzy or damaged hair try this leave-in immediately! You probably won't regret it. But if you are unsure, try getting samples of the product before you commit to the full size. Phyto doesn't carry the cheapest of hair products, but to me, it is a well-worth and likely long-term investment.
Phyto 7 Daily Hydrating Botanical Cream - Dry Hair
Product description
A genuine "day cream" for hair, PHYTO 7 is a unique plant-based formula consisting of seven plant extracts specially selected for their hydrating and regenerating properties (Calendula, Sage, Burdock, Willow, Soybean, Rosemary and Althea). Its creamy, non-greasy formula works to enhance the natural protection of dry hair by maintaining optimum moisture levels. Your hair regains shine, suppleness and body.
Ingredients
Althaea Officinalis Extract (Mucilage Vegetal), Arctium Majus Root Extract (Bardane), Rosmarinus Officinalis (Rosemary) Leaf Extract (Rosmarin), Salvia Officinalis (Sage) Leaf Extract (Sauge), Calendula Officinalis Flower Extract, Salix Alba (Willow) Leaf Extract (Saule), Lecithin (Soja), Sodium Dehydroacetate, Propylene Glycol, Phenoxyethanol, Parabens (Butyl, Ethyl).
Directions for Use
Apply after shampoo to towel-dried hair. Squeeze a pea size amount of Phyto 7 into the palm of your hair and distribute evenly throughout hair, concentrating on the ends. Do Not Rinse. Style as usual.
Phyto 9 Daily Ultra Nourishing Botanical Cream - Ultra Dry Hair
Product description
A genuine "day cream" for dehydrated hair, Phyto 9 is a combination of macadamia oil and plant extracts, all carefully selected for their hydrating and nourishing properties (St. John's wort, calendula, sage, burdock, willow, soybean, rosemary, althea).
Native to Hawaii and very rich in essential fatty acids, macadamia oil has the distinctive feature of resembling sebum and provides intense nourishment without leaving a greasy residue. Soybean, calendula, burdock and plant extracts penetrate the core of the hair fiber to help restore keratin moisture levels. Treated from within and protected on the outside, hair rapidly regains its original shine, suppleness and softness.
Ingredients
Althaea Officinalis Extract (Mucilage Vegetal), Macadamia Ternifolia Seed Oil, Arctium Majus Root Extract (Bardane), Rosmarinus Officinalis (Rosemary) Leaf Extract (Romarin), Salvia Officinalis (Sage) Leaf Extract (Sauge), Calendula Officinalis Flower Extract, Salix Alba (Willow) Leaf Extract (Saule), Hypericum Perforatum Extract (Millepertuis), Lecithin (Soja), Sodium Dehydroacetate, Propylene Glycol, Phenoxyethanol, Parabens (Butyl, Ethyl).
Directions for Use
Apply after shampoo to towel-dried hair. Squeeze a pea size amount of Phyto 9 into the palm of your hair and distribute evenly throughout hair, concentrating on the ends. Do Not Rinse. Style as usual.
My Review:
Having tried both leave-in conditioners, I have to conclude that I prefer Phyto 9 to Phyto 7. Phyto 7 has a slightly more watery texture while Phyto 9 is more creamy. On separate days, I tried Phyto 7 and Phyto 9 on my towel-dried hair. Phyto 7 did not have effect on my hair at all, applying it on towel-dried hair did not help untangle, and after air-drying my hair felt as dry and frizzy as ever. It probably wasn't rich enough for my hair. However, it was a total different story with Phyto 9.
After washing, my hair is normally rather tangled, and a good leave-in conditioner usually helps provide lubrication for ease of untangling. Phyto 9 is that leave-in conditioner. It smoothed down my hair and my fingers slid through tangles with little or no coaxing.
Air-dried hair was smooth, shiny and soft to the touch. My brush glided through my hair very easily. The best thing was, it did not weigh down my fine hair! Hair was full of bounce and looked extremely healthy, no lanky or dirty-looking effect like how some leave-ins give.
I did not have to used too much of the product, probably about a 1 cm squeeze into my palm for each half of the head. You do have to experiment to get the right amount that works for you as it depends on factors such as hair length, condition, and hair thickness.
I recommend that anyone with dry, frizzy or damaged hair try this leave-in immediately! You probably won't regret it. But if you are unsure, try getting samples of the product before you commit to the full size. Phyto doesn't carry the cheapest of hair products, but to me, it is a well-worth and likely long-term investment.
It is tempting after a long tired day to just lay down on bed and go straight to sleep. However, most of us use cotton pillowcases, which create a lot of friction between your pillow and your hair, resulting in tangled, frizzy hair, especially for those who toss and turn a lot in their sleep.
To ensure you wake up with beautiful hair, and to save yourself the pain of having to carefully take out knots, here are some steps you can take:
1. Change your pillowcase to a satin or silk one. These smooth materials will allow your hair to glide over it throughout the night, preventing it from catching and knotting.
2. Put your hair into a bun or braid before sleeping. I always sleep with my hair loosely braided and secured with a hair-safe ponytail holder as I toss in my sleep and thus find that my bun tends to come loose during the night. If you do however choose to bun your hair, a bun high on the top of your head would probably feel the most comfortable.
3. Wear a satin/silk nightcap or bonnet instead of putting hair into a braid or bun. Alternatively, further protect your hair by wearing it over your updo. Do take care to choose a nightcap that is not tight as it will probably feel uncomfortable wearing it for hours. You can even wrap your hair in a satin/silk scarf if you have one.
Monday, September 28, 2009
Labels: Prevent tangles, Protect hair when sleeping, Satin pillowcase, Silk pillowcase0 comments
Swimming is great for a full body workout but chlorine in swimming pools can be a killer for your hair. So how should we protect our hair when swimming? Well, before heading into the water, cover your hair with a layer of hair conditioner or oil. Oil might be a better option as it doesn't get washed off easily while conditioner will get washed off as you swim. I personally use coconut oil for my hair but you can use olive oil or baby oil too if you find the smell of coconut oil too strong.
Also, it is best to invest in a swimming cap for added protection. Though the cap doesn't totally prevent water from entering, conditioner or oil on your hair will stay on longer with the cap. However if you have longer hair and find it hard to fit all your hair into a swimming cap, you can always braid it instead. Or else, swimming caps specially catered to those with long hair are available too, though they might be a little hard to find.
After your swim, head to the shower immediately! Don't let the chlorine water sit in your hair. Be sure to shampoo well to get all the oil/conditioner out of your hair. After toweling your hair till it's damp and not dripping wet, spread a leave-in conditioner evenly throughout to repair damages. Run your fingers through your hair or use a wide-toothed comb to ensure the conditioner is applied to the inner layers of hair too. Be sure to always condition hair after swimming to prevent hair from turning into hay!
It is understandable that those of us who have long hair will find it hard to part with any of it, regardless of how little. However, it is important to note that regular trimming is needed if you are to keep your hair healthy. Dry and split ends are very common in long hair as sebum produced at the scalp seldom reaches the ends of the hair. Also, most of us lack enough nutrients in our diet to nourish both our body and hair. Thus, these split ends must be cut away to prevent further splitting along the hair.
I would recommend a visit to the hair salon every 3 months or so. If your hair is rather healthy, you could probably drag that to 5 months instead. Trimming your hair can also make it appear neater and have a more defined shape, thus causing you to look more well groomed.
Many of us have heard horror stories where a lady enters a salon with knee-length hair and leaves with a bob. To prevent such scenarios, here are some pointers:
1. Specify your desire to only TRIM and not CUT (better yet specify the length you want to trim, e.g. 1 inch)
2. Bring a friend with you so that she can help you monitor the trimming process (stylists usually cut shorter than you want because they think they know what's best and you can't see what they are doing anyway. Your friend will be able to pressurize the stylist into not over-cutting)
3. State clearly that if too much of your precious hair is lost, you will refuse to pay and never come back again (maybe use this as a last resort as you might get thrown out of the salon)
4. Periodically remind your stylist not to cut off too much
5. Observe the length of hair falling to the ground. If it looks scarily long, remind your stylist that you only want a trim.
Is your hair brittle and dry, never seeming to grow any longer no matter how you wait and hope? Well this just might help you grow a luscious lock of hair.
What you need to start is 100% pure coconut oil, a tablespoon, a large bowl to contain hot water, a smaller bowl to contain the oil and a small towel to wrap around your head. I personally use Parachute brand coconut oil, it's cheap and great, but you are free to use anything you can find easily. For shoulder length hair, slightly less than 2 tablespoons of coconut oil should suffice. Measure the amount of coconut oil required and pour this into the smaller bowl. Then place it into the bigger bowl, which should have been filled with hot water. Use the spoon to stir the oil around a bit to let it heat up.
When the oil is warm, carefully spoon some up and drip along your parting, massaging your scalp as you do so. Sweep your hair over to expose a different part of the scalp and repeat. Do this until your whole scalp is covered in the oil. You don't really have to apply a lot, just a few drop for each part should do. Massage your scalp for at least a minute before moving on to the rest of your hair.
Using the spoon, pour some of the remaining oil in your palm and briefly rub your hands to spread it on both palms. Then run your hands down the length of your hair, coating it with oil. Repeat this until your whole head of hair, including the inner layers, is oiled. By now, the hot water would have cooled down a little. Soak your small towel in the warm water and wring it out till it's damp. Then pile your hair on top of your head and wrap the towel firmly in place. This gives your hair a sort of spa or steaming effect, promoting blood circulation to the head.
After 1 hour, remove the towel and proceed to wash and shampoo your hair. Be sure to shampoo properly after this treatment or you'll end up with an oily scalp. I do this about twice a week and it provides such a good environment for hair growth that I have to trim my fringe about once every 3 weeks to maintain it. Before I could even go months without trimming!
Subscribe to:
Posts (Atom)